How to connect Microsoft Defender for Endpoint to your HighGround account
Sync your Endpoint Protection data from Microsoft Defender for Endpoint
You can use your Microsoft Defender for Endpoint account alongside HighGround to retrieve your Endpoint Protection data. This data can then be used to drive your Cyber KPI's. In order to synchronise this data to your HighGround account, you will need to connect to Microsoft Defender for Endpoint API by first generating API credentials, and then integrating the tool to via the Integrations module.
The following process is reasonably technical, so please have a member of your IT team complete this if you do not have any prior experience with API's.
Please follow the steps below to generate API credentials for Microsoft Defender for Endpoint first, before moving onto our guide on How to Integrate a tool with your HighGround account.
STEP 1: Log in to Azure
Login to Azure using a Global Administrator account.
STEP 2: Retrieve your Tenant ID
The integration will require your Tenant ID.
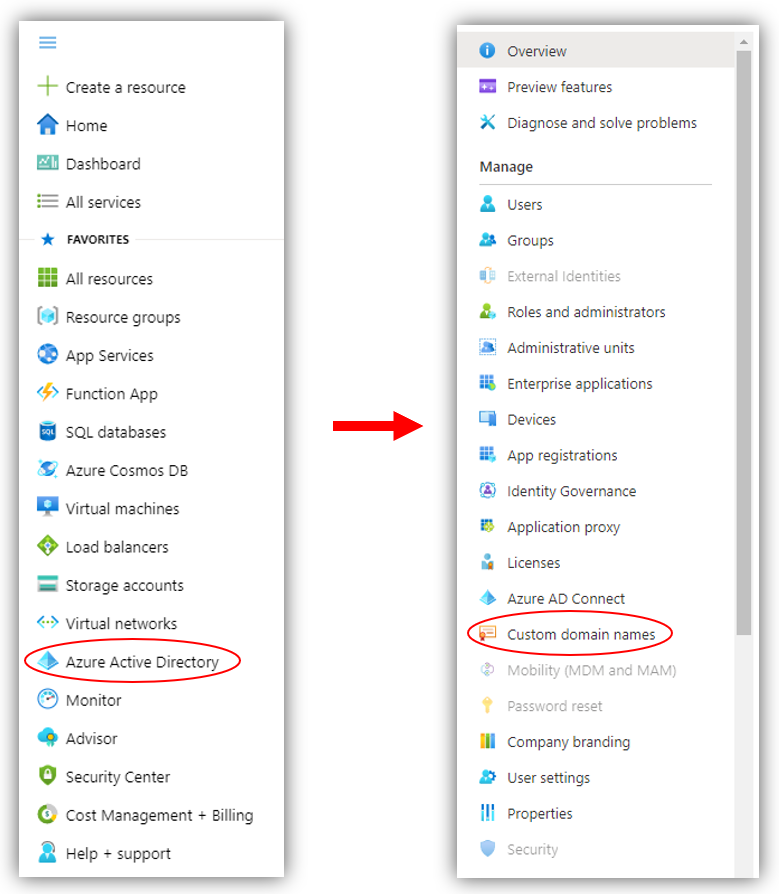
To find your Tenant ID, click on Active Directory from the main left-hand menu, and then navigate to Custom Domain Names:
You should now be able to see a list of your domains (these have been blanked out in the screenshot below).
Your tenant ID is the domain ending with '.onmicrosoft.com'.
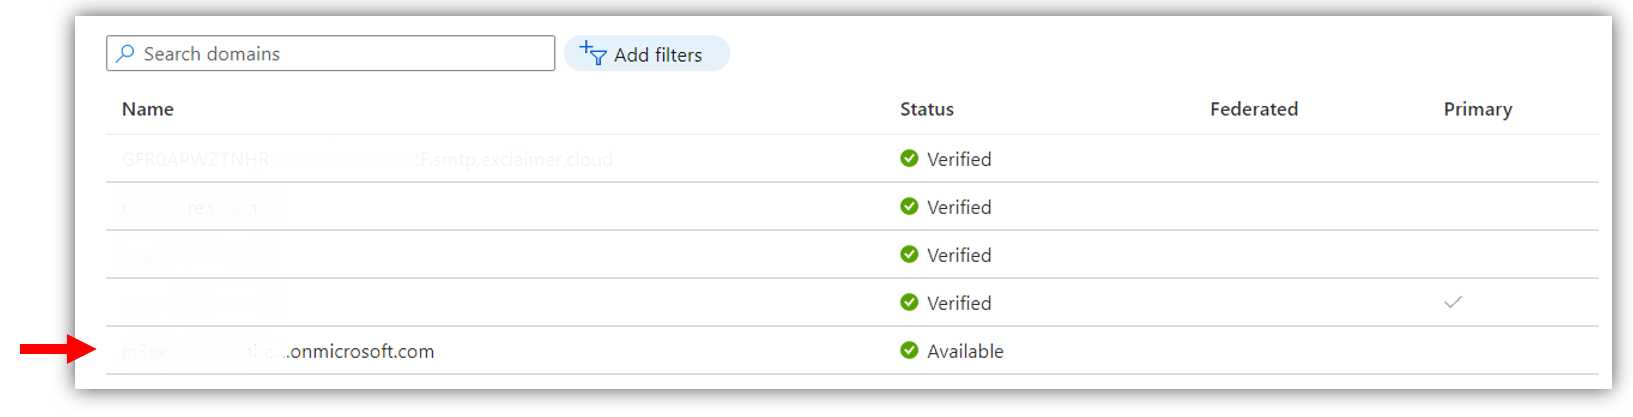
Take a note of this as you will need it in the last step of this guide.
STEP 3: Go to App Registrations
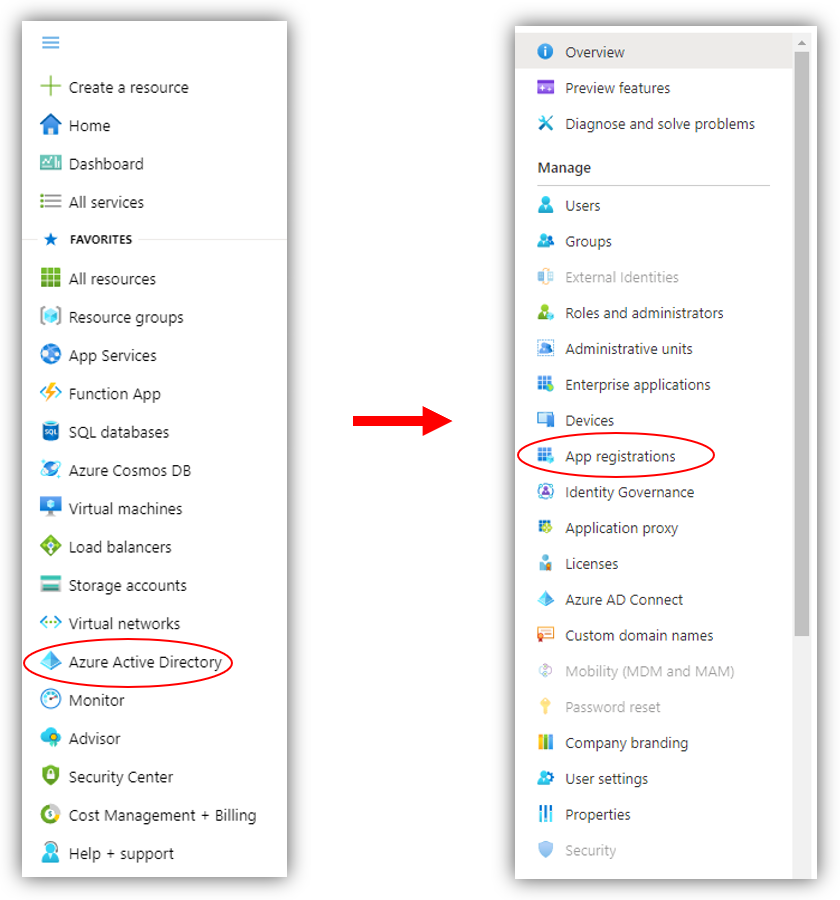
From the main left-hand menu of Azure, click on Azure Active Directory, and from there navigate to App registrations:
STEP 4: Register Application
Once in App Registrations, click on the New Registration tab.

You will now see a window where can add the details of your application.
- Name: HighGround.io - Defender for Endpoint
- Supported Account types: ensure the default option 'Accounts in this organizational directory only' is ticked
- Leave the option to add a Redirect URI blank
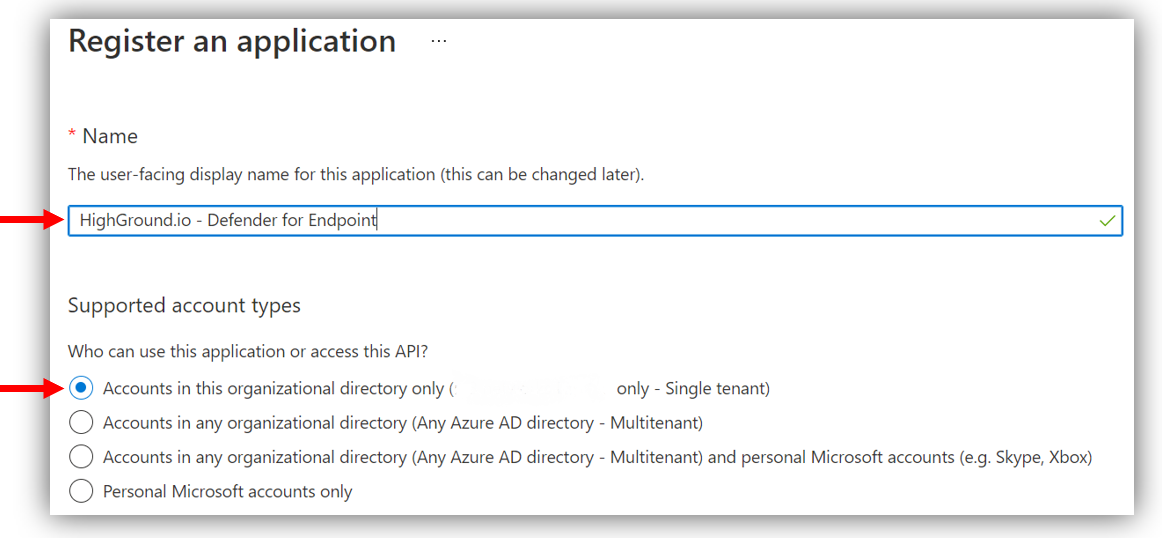
After adding those details, click the Register button to finish registering your application.

STEP 5: Retrieve your Application ID
Now you have registered the Application, you will be taken to an overview of its details.
In the second row of this list, you will find your Application (client) ID. This ID will be a 32-character string separated by hyphens.
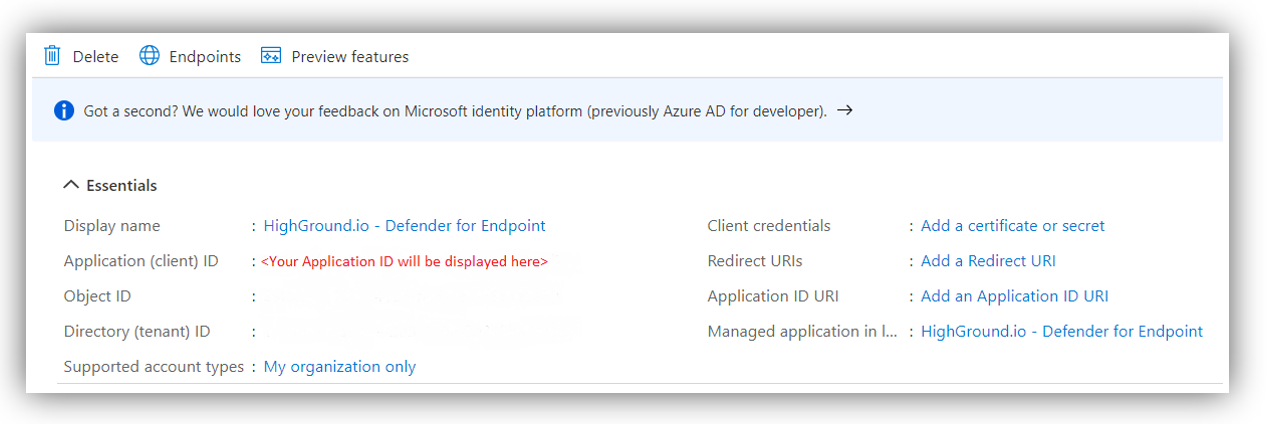
Keep a note of your Application (Client) ID as this will be needed in the final step of this guide.
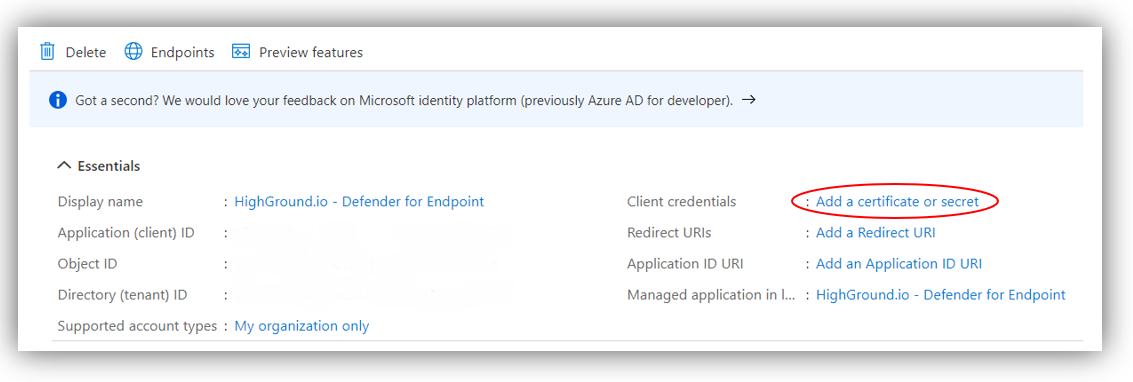
STEP 6: Create a Client Secret
You now need to generate a Client Secret.
To do so, click Add a certificate or secret next to Client Credentials:
Under the Client Secrets section, click New client secret:
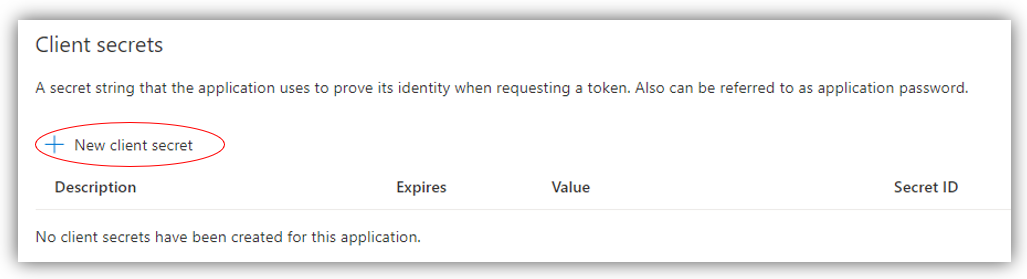
This will open a new window where you can enter a description and expiry date for the secret:
- Description: 'HighGround-Secret'
- Expires:...
After defining those details, click Add:

You should now see your Client Secret below the Secret ID column:
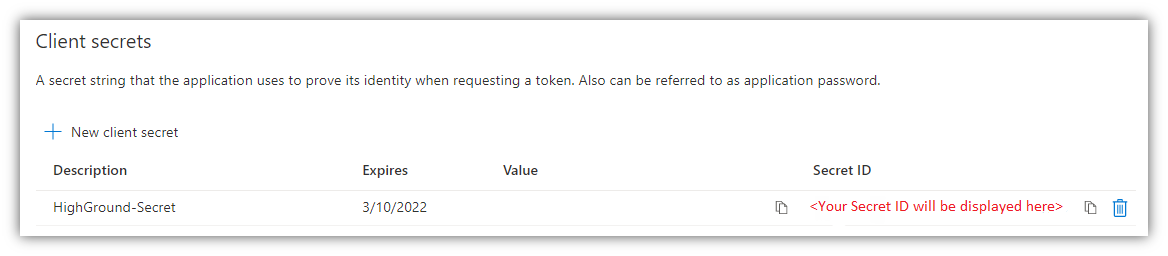
Keep a note of your Client Secret as this will be needed in the final step of this guide.
STEP 7: Assign Permissions
You now need need to allocate permissions to the App you have registered.
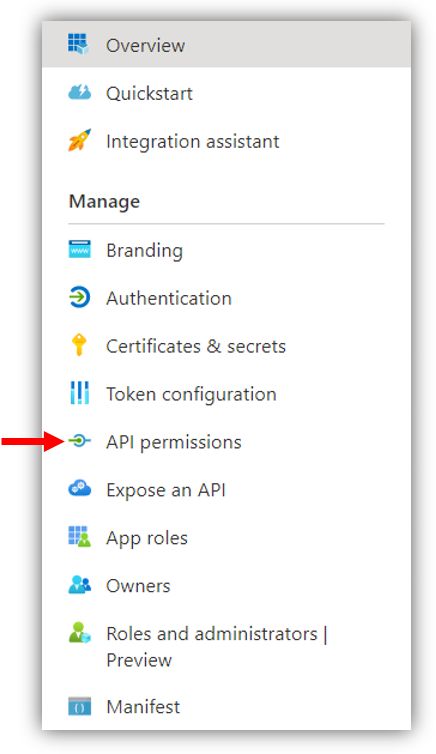
To do so, click on API Permissions from the left-hand menu:
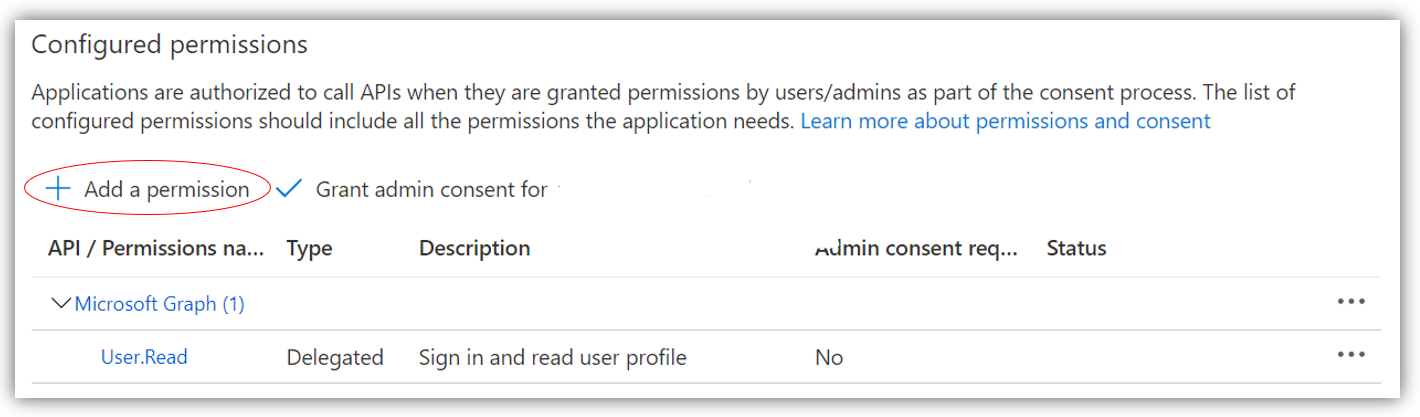
You will now see a screen resembling below. Click Add a Permission:
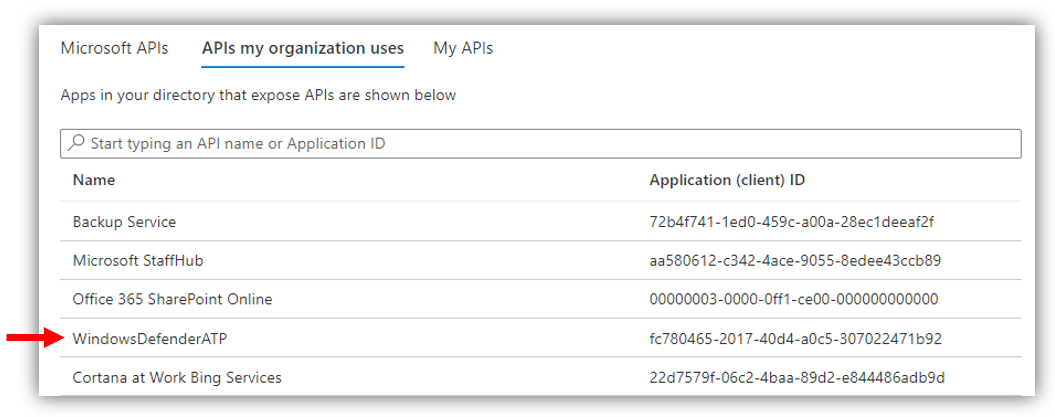
In the window that opens up, click on the tab APIs my Organisation Uses, and click on WindowsDefenderATP:
In the new window that opens, select the Application Permissions option underneath What type of permissions does your application require?:

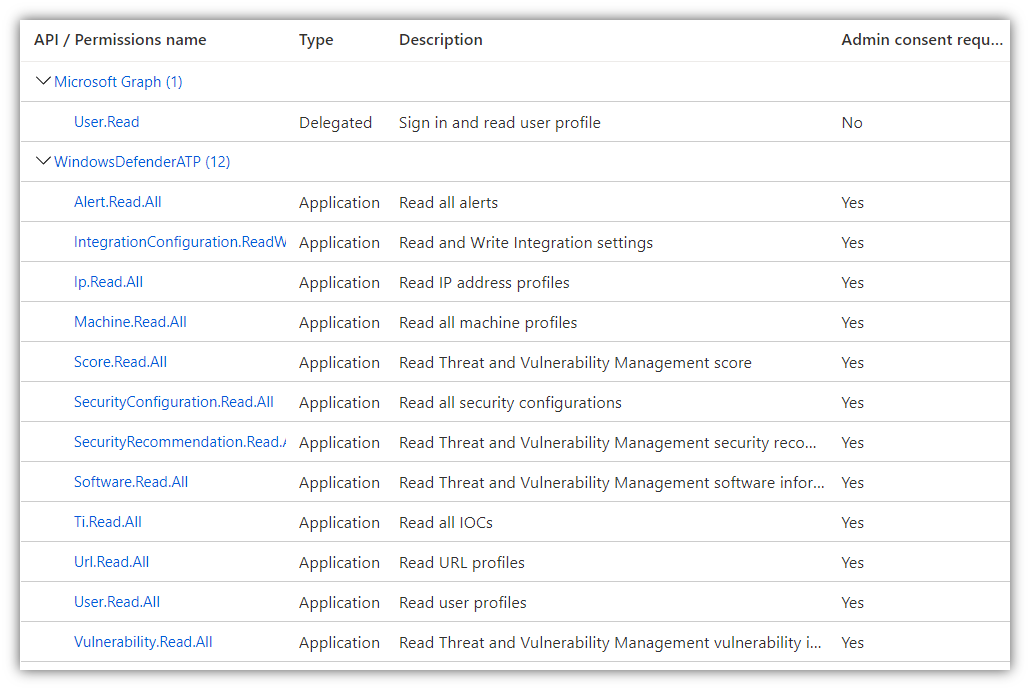
Next, under Select permissions, expand the following options and tick each permission:
-
IntegrationConfiguration
- IntegrationConfiguration.readWrite
-
Ip
- Ip.Read.All
-
Machine
- Machine.Read.All
-
Score
- Score.Read.All
-
SecurityConfiguration
- SecurityConfiguration.Read.All
- SecurityRecommendation.Read.All
-
Software
- Software.Read.All
-
Ti
- Ti.Read.All
-
Url
- Url.Read.All
-
User
- User.Read.All
-
Vulnerability
- Vulnerability.Read.All
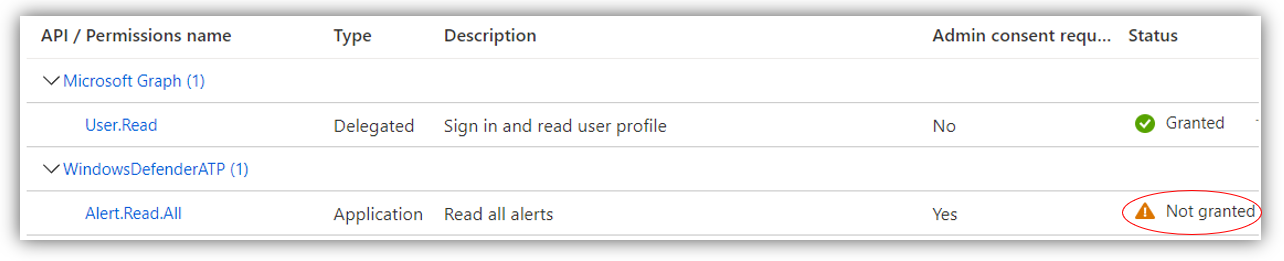
After selecting all of the previous permissions, click Add Permissions, and you should now have a list looking like below:
STEP 8: Grant Consent
For now, there will be an orange warning icon in the Status column of your Configured Permissions, indicating that you have not granted consent for this permission.
To consent, tick the Grant admin consent for <name of your organisation> option.
This will prompt you to grant admin consent confirmation. Click Yes to consent.

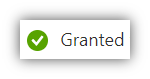
The previous orange warning icon in the Status column will now update to a green tick to reflect this.
STEP 9: Integrate Microsoft Defender for Endpoint to HighGround
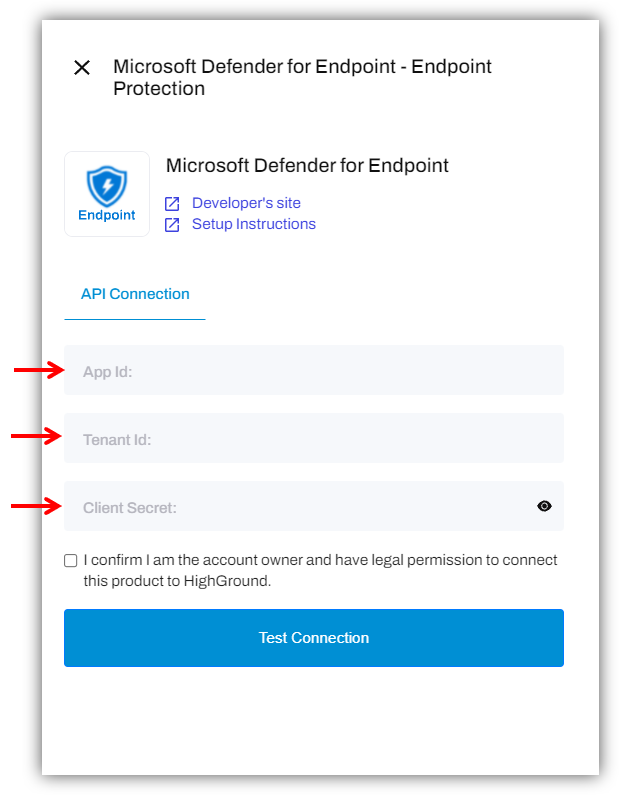
You can now use the App ID, Tenant ID and Client Secret retrieved in earlier steps to integrate the tool to your HighGround account.
To do so, you will need to go to the Integrations area of your HighGround account, and find the Microsoft Defender for Endpoint under the Endpoint Protection technology. Clicking on 'Connect Tool' will open a window for you to enter your integration details:
What happens next?
Continue with the integration setup (as pictured in the integration connection window above) to complete the process of connecting your Microsoft Defender for Endpoint tool to HighGround.
Note: that it may take up to 2 minutes to test the connection, so please do not navigate away from the window until this test has completed.
If you are unsure of how to complete the integration, you can look at our guide on How to Integrate a tool with your HighGround account.