Guide to the Cyber Essentials Module
An Overview of this essential Cyber Security Certification for UK Businesses
Table of Contents
What is Cyber Essentials?Cyber Essentials Status'How to Use the Cyber Essentials Module:What is Cyber Essentials?
Cyber Essentials (CE) is a UK Government-backed scheme run by the NCSC (National Cyber Security Centre) that can help to protect any size organisation from the most common cyber attacks. Most cyber attacks are unsophisticated and untargeted, and it these kinds of attack that Cyber Essentials is designed to protect your business against.
Cyber Essentials is a self-assessment questionnaire that involves 5 technical controls that your IT systems must comply with in order to meet the standard.
To learn more about Cyber Essentials and how your organisation can benefit, you can go to this article.
Get Certified with HighGround
Our Cyber Essentials Service will prepare your IT systems to Cyber Essentials standards, as well as make the certification request on your behalf. To purchase this service, follow the steps below:

This will take you to a page displaying all of the paid services which HighGround offers. Look for Cyber Essentials.

Click on Cyber Essentials. This will open a new window to the side:
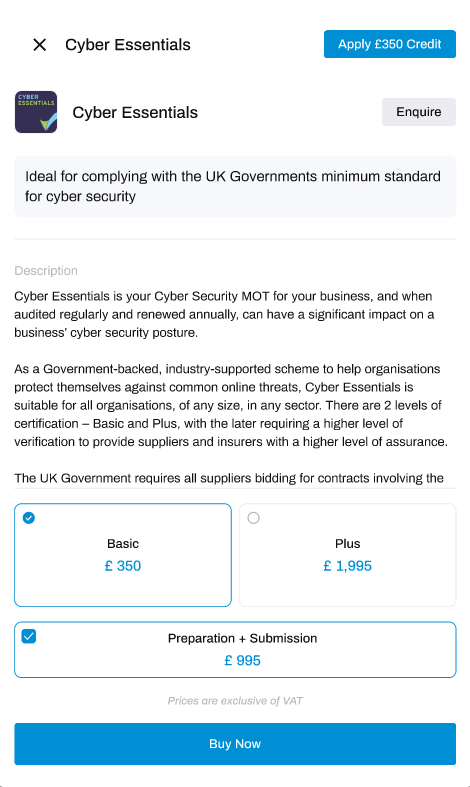
If you would like to learn more before making a purchase, click the Enquire button located toward the top right-hand corner of this window.
- Basic: this is the Basic Cyber Essentials certificate, which involves a self-assessment questionnaire.
- Plus: this is the Cyber Essentials Plus certificate, which involves an on-site assessment and vulnerability scan in addition to the questionnaire.
- Preparation + Submission: before making your application for certification - we will look at your IT infrastructure and security policies, and reconfigure these to meet Cyber Essentials standards. This ensures your application for certification will not fail, avoiding the hassle and costs of applying a second time.
Once you have selected from the above options, click the Buy Now button to make the purchase.
And that's it! A notification will get sent to our Pro Services team who will contact you within 24 hours to get started with your certification.
Delete
Understanding your Cyber Essentials Status'
In order to stay up-to-date and effective, your Cyber Essentials certificate must be renewed yearly, and reviewed every 90 days. The Compliance Status' are designed with this in mind, and will keep you informed on the health of your Cyber Essentials.
To learn more about what your status means, choose the matching icon from the tabs below:

Status' in a default state appear as a blue cross, and indicate that you have not uploaded a Cyber Essentials certificate yet.
Delete
Status' in a healthy state appear with a green tick, and the word Certified. Overall, this status indicates that your certificate is in place, and has been reviewed recently.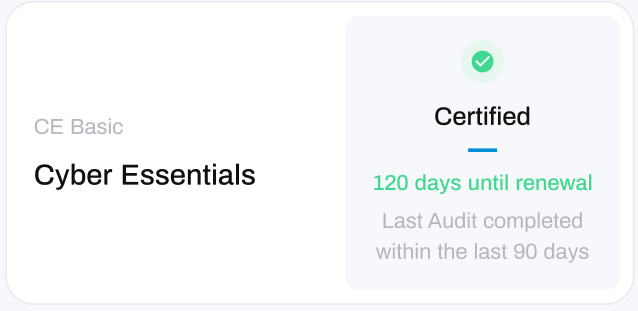
Specifically, this status indicates that:
- Your Cyber Essentials certificate has been uploaded, and renewal is not due within the next 45 days.
- You have reviewed your Cyber Essentials within the last 90 days.
- You have just earned your certification in the last 90 days.

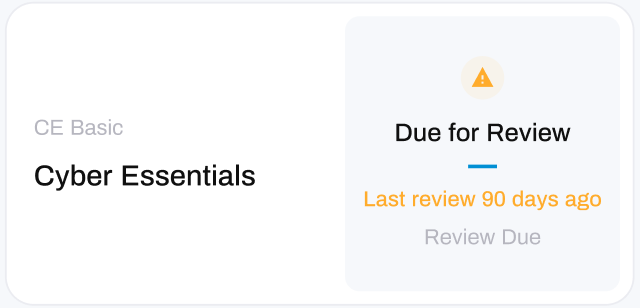
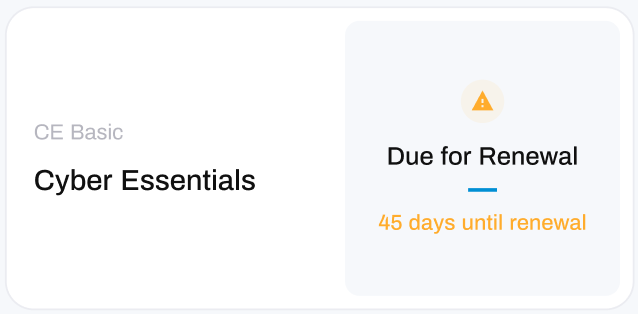
Status' in a warning state will show with an orange exclamation mark and the words Due for Review or Due for Renewal. Overall, this status indicates that your certificate is either awaiting renewal or is due for review.
Due for Review:
- Your certificate has been uploaded, but the last review was over 90 days ago.
Due for Renewal:
- Your certificate has been uploaded, but it is just for renewal in the next 45 days.

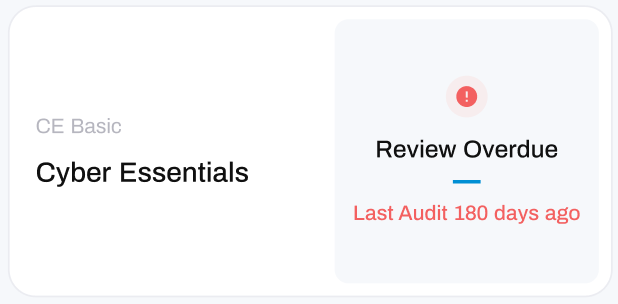
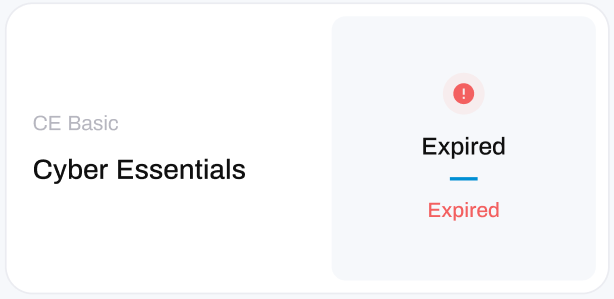
Status' in a critical state appear as a red exclamation mark, alongside the words Expired or Review Overdue. Overall, these statuses indicate that your Cyber Essentials certificate has either expired or is overdue for a review.
Review Overdue:
- It has been over 180 days since your Cyber Essentials was last reviewed.
Expired:
Your Cyber Essentials certificate was not renewed in time and has expired.
Find your Status Details:
You can see the specific details and reasons for your Compliance Status by hovering over the information icon located at the bottom-left of your certificate:
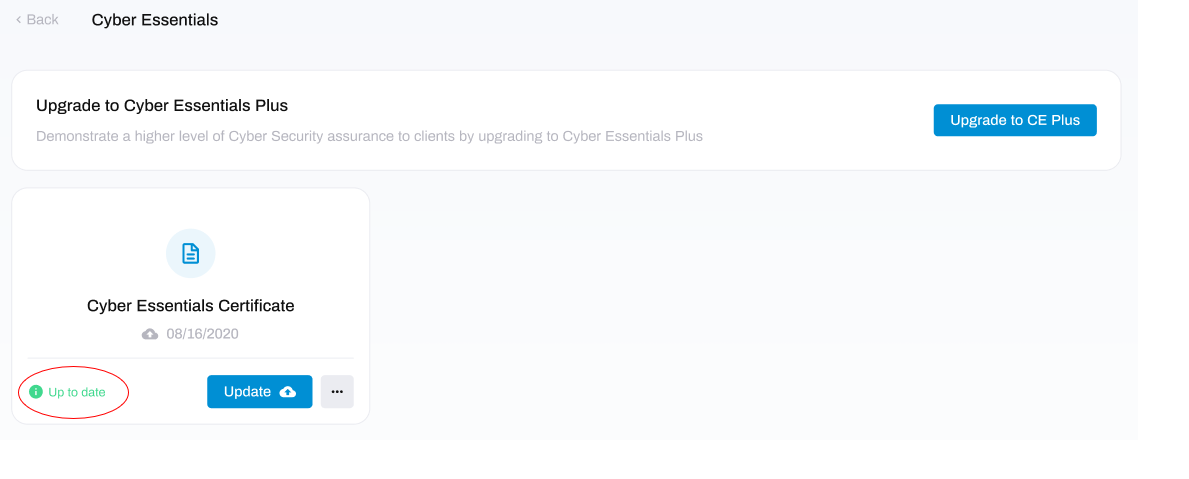
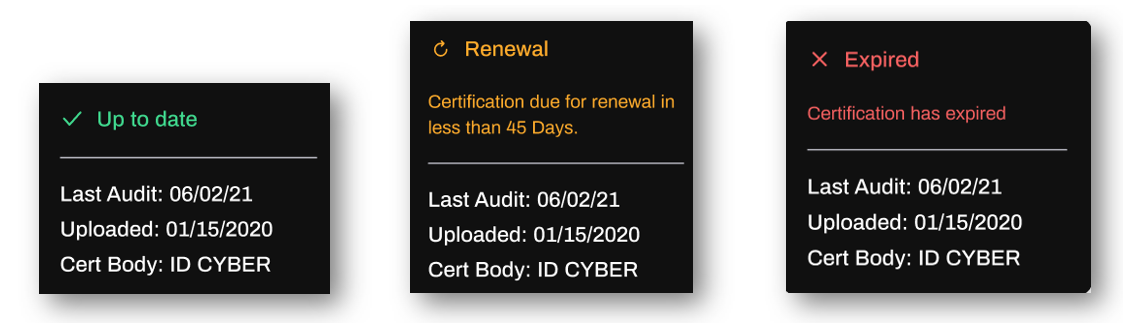
Doing so will trigger a small information box to appear. This box contains the reason for your status, along with the details:
- Last Audit: the date you last reviewed your Cyber Essentials.
- Uploaded: the date you uploaded your certificate
- Cert Body: the name of the certification body who granted your certificate
How to Use the Cyber Essentials Module:
Managing your Certificate:
Upload/Download Certificate
Upload your Certificate:
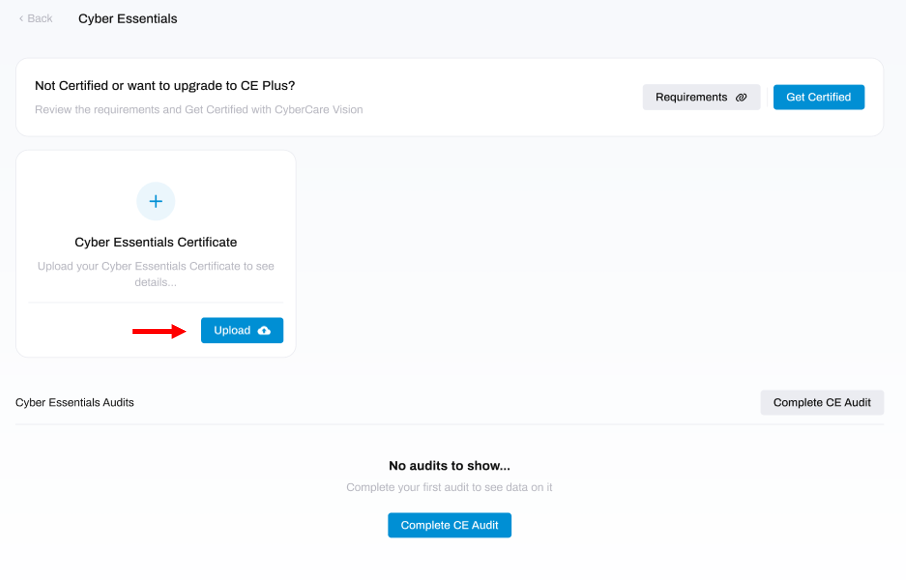
To upload your CE certificate, click either the + icon or up the Upload button located in the box titled Cyber Essentials Certificate.
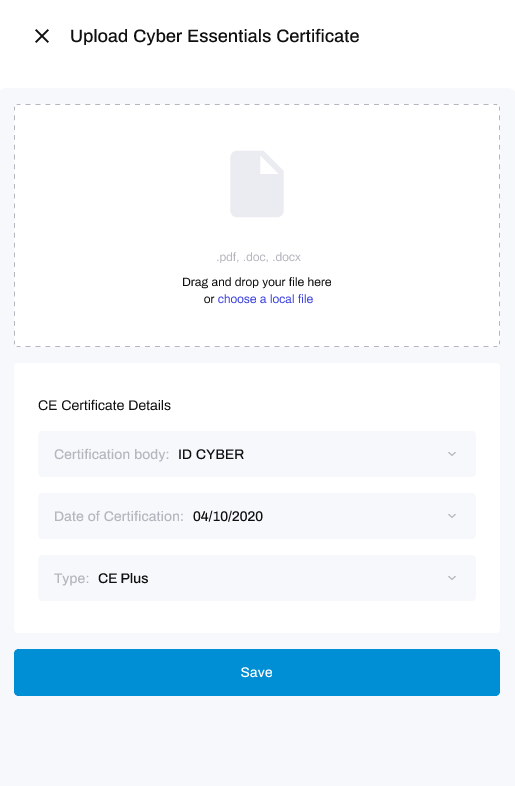
This will open a new window to the side:
Next, use the drop-down arrows in the CE Certificate Details section to add the details for:
Certification Body: this is the name of the organisation that granted the certificate (not to be confused with IASME who are the sole Accreditation Body for Cyber Essentials).
Date of Certification: the date that the certification was awarded.
Type: whether it is a basic Cyber Essentials certificate, or a Cyber Essentials Plus certificate.
After, click Save.
And that's it! You have uploaded your CE certificate.
Download your Certificate:
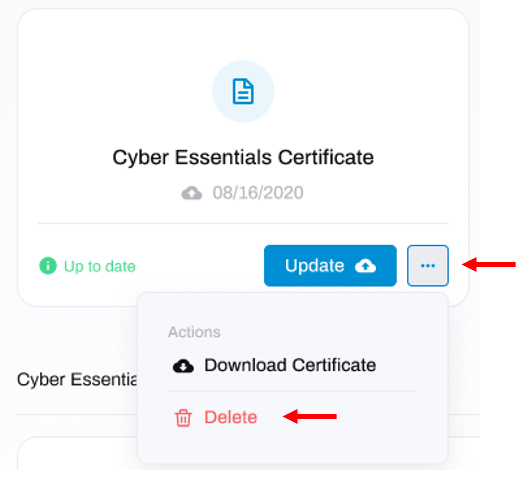
To download your CE certificate, click the three dots to the bottom-right of the Cyber Essentials Certificate box, then click Download Certificate.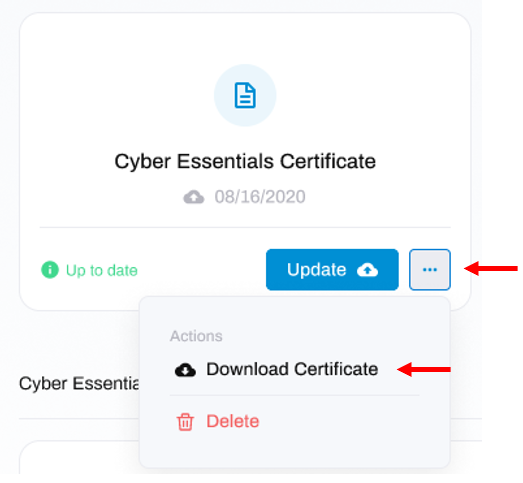
Your certificate should now be accessible on your device.
And that's it! You have downloaded your certificate.
Update Certificate
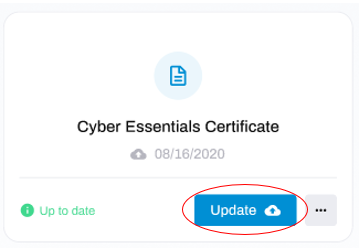
To update your Cyber Essentials certificate, click the Update button:
This will open a new window:
Next, use the drop-down arrows in the CE Certificate Details section to update the details for:
Certification Body: this is the name of the organisation that granted the certificate (not to be confused with IASME who are the sole Accreditation Body for Cyber Essentials).
Date of Certification: the date that the certification was awarded.
Type: whether it is a basic Cyber Essentials certificate, or a Cyber Essentials Plus certificate.
After, click Save.
And that's it! You have uploaded your CE certificate.
Delete Certificate
Click the three dots to the bottom-right of the certificate, and click the Delete option.
Managing Audits:
Overview of Cyber Essentials Audits
NOTE
We recommend performing Cyber Essentials Audits every 90 days. This will have a positive impact on your CyberCompliance KPI.
Your IT infrastructure is continually changing - staff changes, new devices and software, and new technologies to solve business challenges to name a few. It is essential that you ensure these comply with the Cyber Essentials standards, otherwise your certification is becoming increasingly meaningless. Performing regular audits of your Cyber Essentials is the best way to do this.
At a minimum, you will have to perform an annual audit when you come to renew your certification.
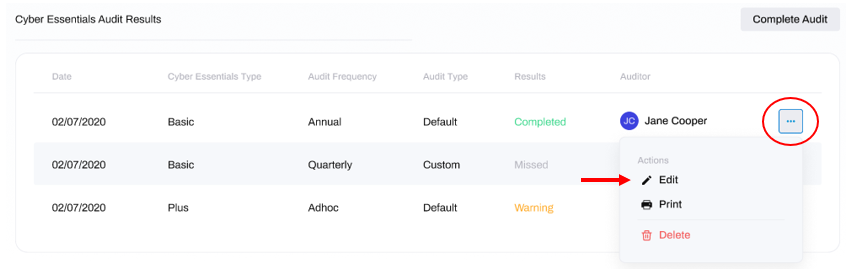
At the bottom of the Cyber Essentials module you will see the Cyber Essentials Audit Results section:
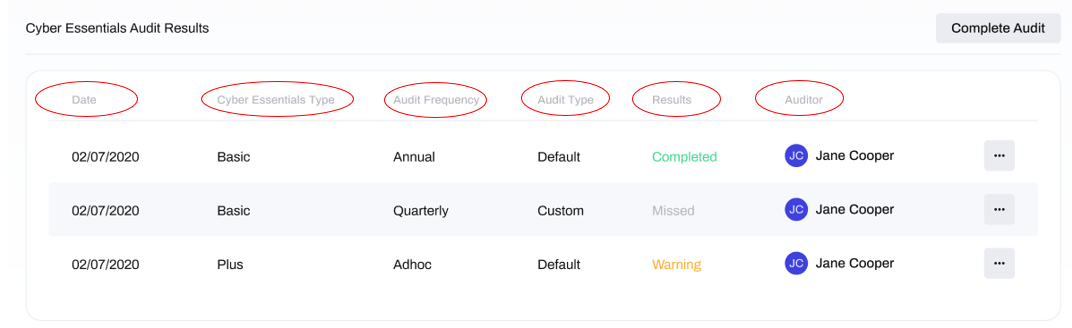
Here you can see all your scheduled and conducted audits, along with the following information:
- Date: the date that the Cyber Essentials Audit was performed.
- Cyber Essentials Type: the type of certification you hold and are auditing (Basic or Plus).
- Audit Frequency: the frequency at which you performed the Cyber Essentials Audit. You define this when you perform the audit.
-
Audit Type:
- Default: the Cyber Essentials Audit is the default audit provided by HighGround and has not been edited.
- Custom: the default questions in the Cyber Essentials Audit have been edited, deleted, or new questions have been added.
- Results: whether the Cyber Essentials Audit has been Completed or is Incomplete.
- Auditor: the name of the person who performed the Cyber Essentials Audit.
Perform a Cyber Essentials Audit
Navigating Audits in HighGround
At the side of the review window is a progress section. Here you can see the various sections of the review, which sections you have completed, which are incomplete, and which are yet to be viewed:
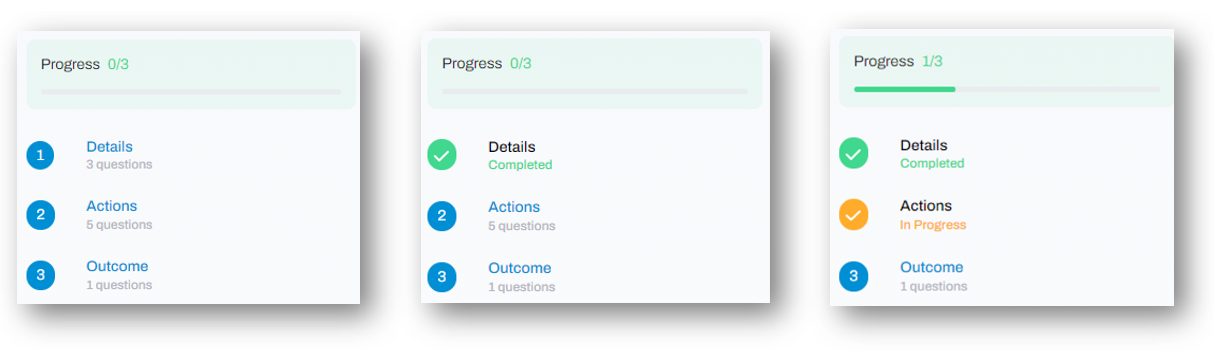
- Progress bar: indicates how much of the audit/review you have completed.
- Blue circle: indicates a section which has not been started yet.
- Orange tick: indicates the section has been started but is incomplete. This will occur if you leave a section without completing all questions.
- Green tick: indicates all questions have been answered in this section.
Additionally, you can click on any of the sections to quickly navigate to that stage of the review.
Once you have uploaded your Cyber Essentials certificate, you will need to audit it at least once every year before renewal. There are three stages within a Cyber Essentials Audit; adding the details, reviewing the questions, and providing a summary.
Follow the steps below to learn how to complete these stages:
STEP 1: Go to Cyber Essentials Audits
At the bottom of the Cyber Essentials window is an area where you can perform your Cyber Essentials Audit:
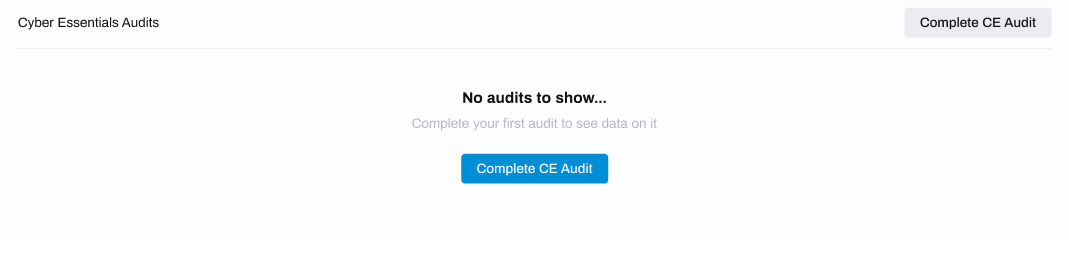
Click either of the Complete CE Audit buttons located in the centre or top-right of this section. This will open a new window.
STEP 2: Add the Cyber Essentials Audit Details
In this new window, use the drop-down arrows and text box to supply the following details:
- Audit Date: the date that you are performing your Cyber Essentials Audit.
- Audit Frequency: the frequency which you are performing this audit at, for example your recommended 'Quarterly' audit.
- Cyber Essentials Type: the type of Cyber Essentials certification you are auditing. Certificates come in Basic or Plus variants.
- Auditor: the name of the person responsible for conducting the audit should also be added at the bottom.
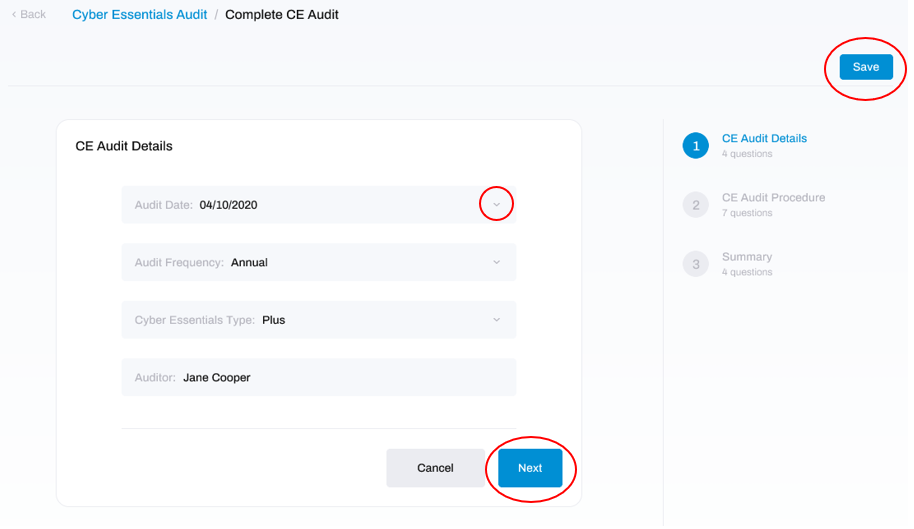
After you have added these details, click Next.
STEP 3: Review the Questions
You will now see a list of items for you to review.
Read through each question carefully and perform any actions/checks required to answer the question. After, toggle the 'Reviewed' slider to on (blue).
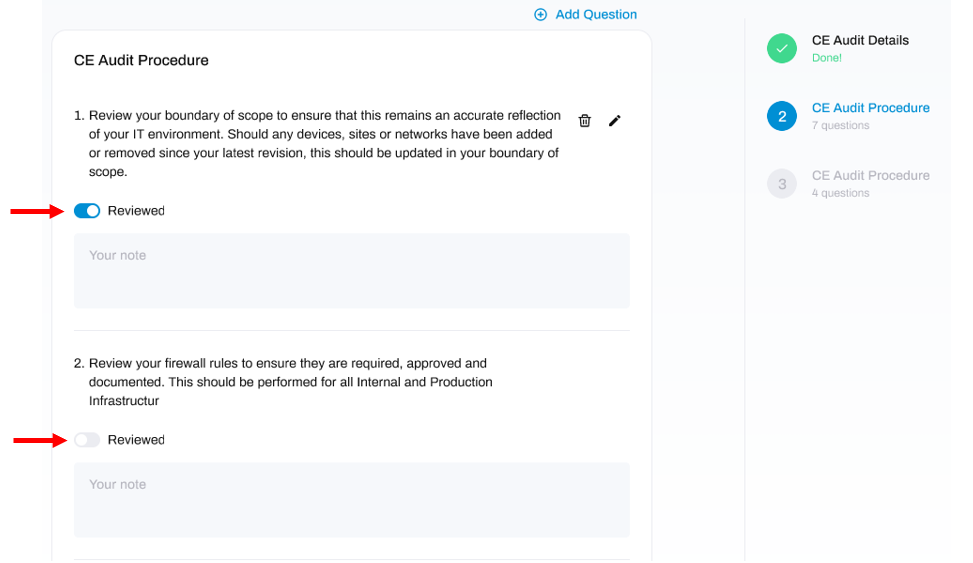
After you have reviewed all the questions, click the Next button located at the bottom-right of the page.
STEP 4: Complete the Summary
The last stage of the Cyber Essentials Audit involves completing the summary.
To complete this, you will need to select either Yes or No to the questions (adding notes if relevant), and leave any relevant notes/comments at the bottom.
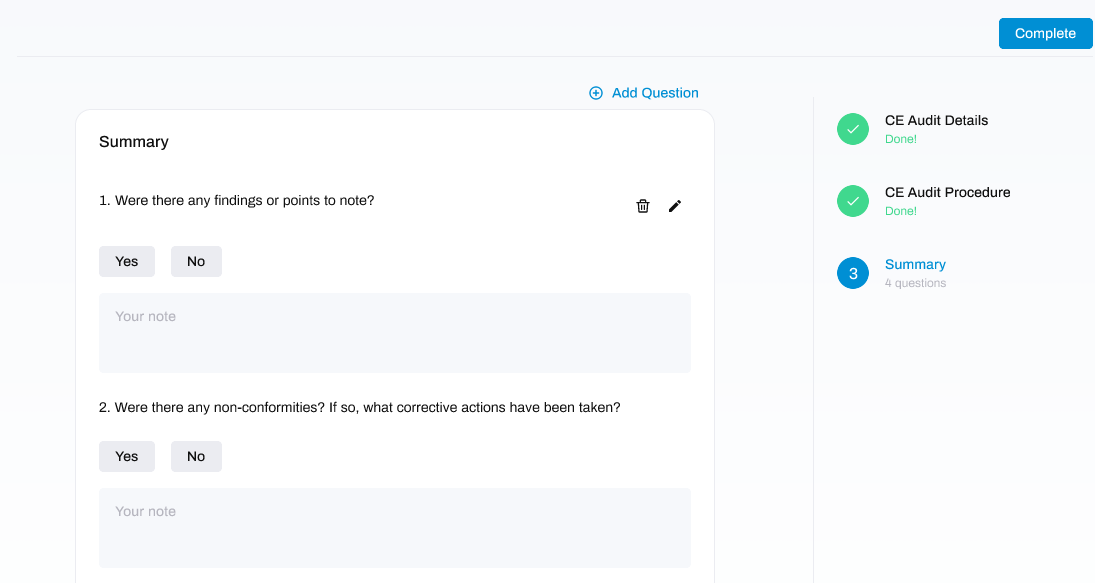
After completing the summary, click the Complete button at either the top-right or bottom of this window. This will take you to a new window where you will see your completed Cyber Essentials Audit.
And that's it! You have completed a Cyber Essentials Audit.
Add/Edit/Delete the Audit Questions
The audit is fully customisable. Both the number and content of the audit questions may be modified.
Add a Question:
STEP 1: Edit the Audit
If you are already inside the audit currently, skip to the next step!
First, click the three dots to the right of the audit that you want add a question to, and click the Edit option.
STEP 2: Add a Question
Now you can add a question by clicking the Add Question button towards the top-right of the window.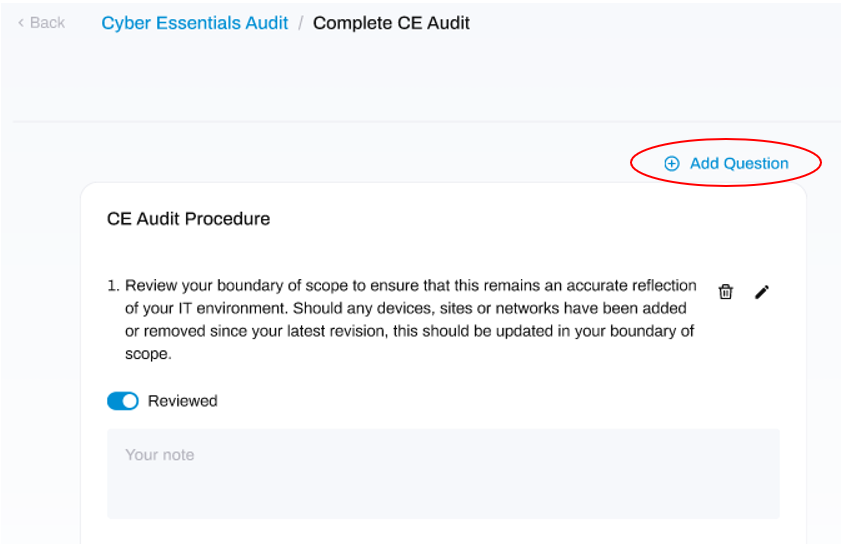
This will open a window where you can write your question, and decide the answer type (options include a Note Field, Yes/No box, or Date/Time selector).
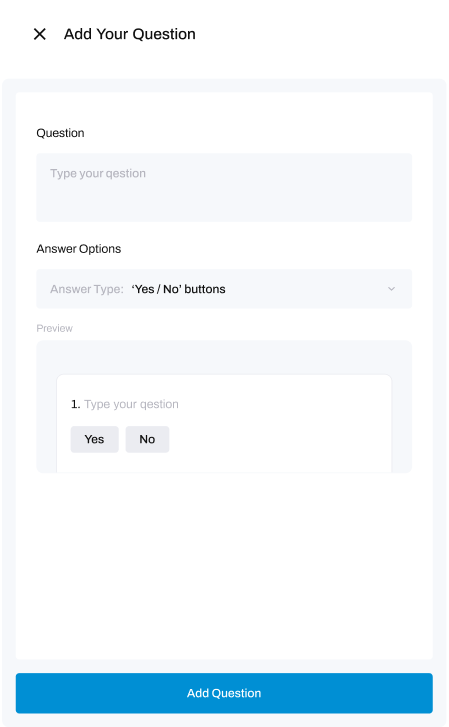
After composing your question, click Add Question.
That's it! You've added a question.
Edit a Question:
STEP 1: Edit the Audit
If you are already inside the audit currently, skip to the next step!
First, click the three dots to the right of the audit that you want to edit, and click the Edit option.
STEP 2: Edit the Question
Next, select the pencil icon next to the question you would like to edit.
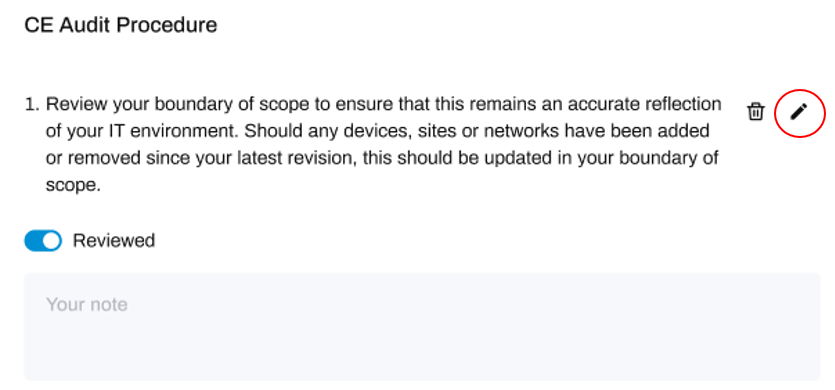
This will give the option to rewrite the question, or change the answer to the question (by clicking Yes or No). Remember to click Save afterwards to maintain your changes.
That's it! You've edited a question.
Delete a Question:
STEP 1: Edit the Audit
If you are already inside the audit currently, skip to the next step!
First, click the three dots to the right of the audit that you want to change, and click the Edit option.
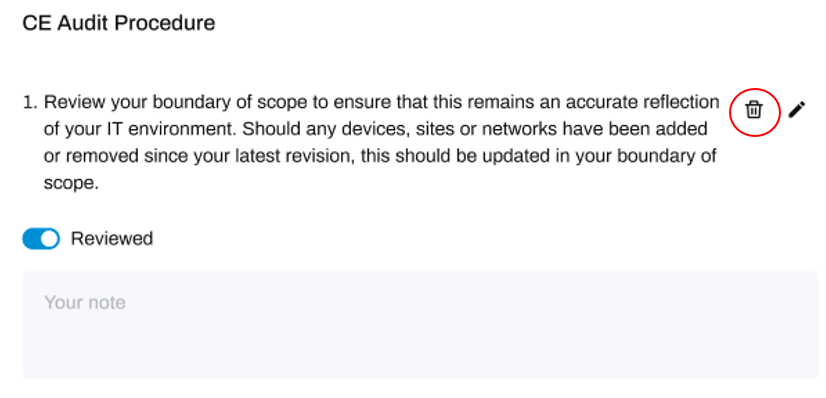
STEP 2: Delete the Question
Now, select the bin icon next the question you would like to delete:
And that's it! You've deleted a question.
Delete an Audit
To delete an entire audit, click the three dots to the right of the audit that you want to delete, and click the Delete option.
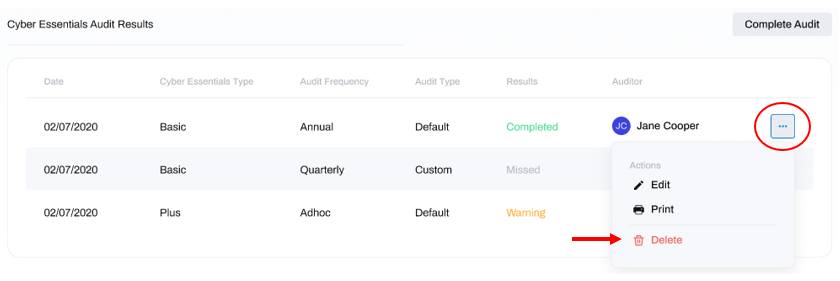
That's it! You've deleted an audit.
Print an Audit
To print an audit, click the three dots to the right of the audit that you want to print, and click the Print option.

This will trigger a download of a PDF file (or open it in a browser tab) so you can print the Audit.